Office Blog
Creating and Customizing Spreadsheets for Small Businesses
In today’s data-driven world, spreadsheets have become essential tools for small businesses. Whether you’re managing finances, tracking inventory, or organizing project schedules, Excel spreadsheets can streamline operations and enhance productivity. This guide will walk you through creating and customizing spreadsheets tailored to your small business needs.
Why Use Spreadsheets?
Spreadsheets offer numerous benefits for small businesses, including:
- Data Organization: Spreadsheets allow you to categorize and manage large amounts of data in an orderly manner.
- Budgeting and Financial Analysis: Track income, expenses, and profitability, helping you make informed financial decisions.
- Project Management: Plan projects, set deadlines, and allocate resources effectively.
- Inventory Tracking: Monitor stock levels, sales trends, and reorder points to maintain optimal inventory.
Getting Started: Creating a New Spreadsheet
- Open Excel: Launch the Excel application on your computer or access it through Microsoft 365 online.
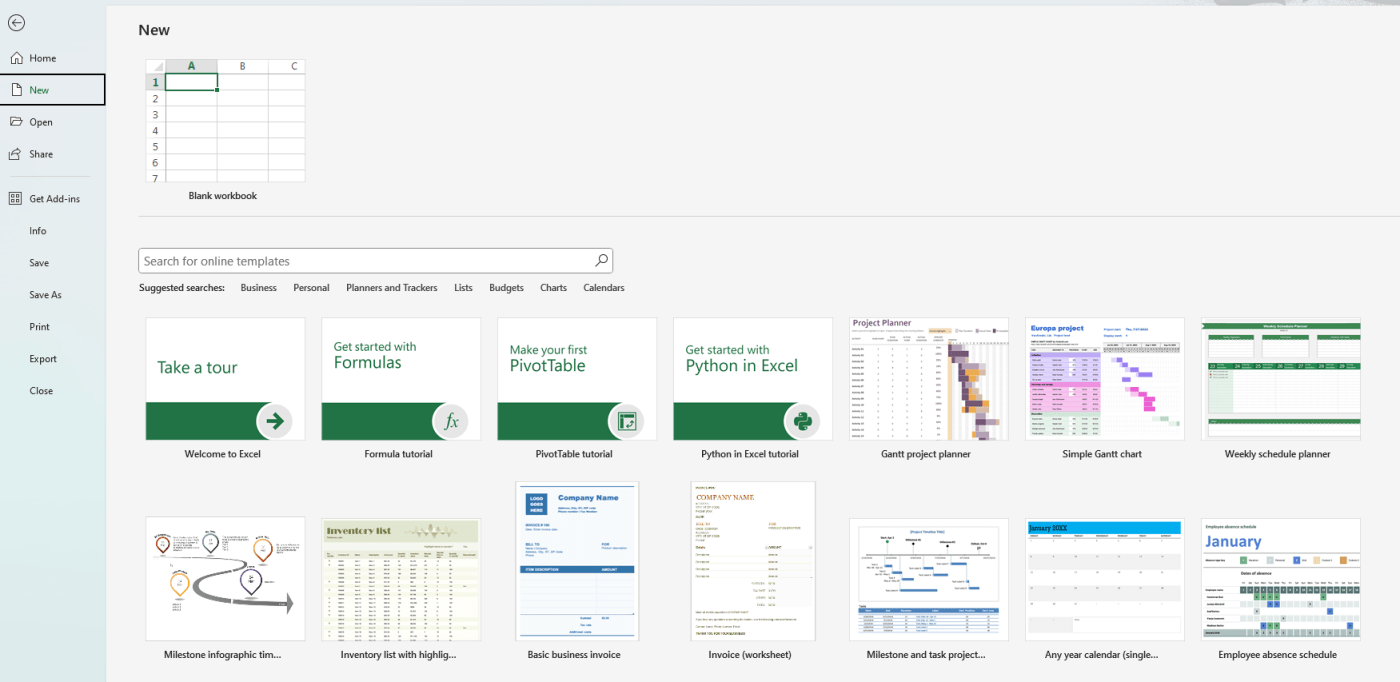
- Select a Template: Excel offers a variety of templates to suit different business needs, including budgets, invoices, and project trackers. You can start with a blank workbook or choose a template that closely matches your requirements.
- Set Up Your Workbook:
- Rename Your Sheets: Click on the sheet tab at the bottom to rename it according to the data it will hold (e.g., “Sales Data,” “Expenses,” “Inventory”).
- Adjust Column Widths: Hover over the lines between column letters and drag to adjust the width for better visibility.
- Enter Your Data: Start inputting your data into the cells. Use headings in the first row to label each column clearly, which will help you and others understand the data later.

Customizing Your Spreadsheet
1. Formatting Cells
Formatting is key to improving readability and organization. Here are some customization options:
- Fonts and Colors: Change the font style, size, and color to enhance visibility. Use bold text for headers to differentiate them from the data.
- Cell Borders and Fill Colors: Apply borders around cells or use fill colors to highlight important data or differentiate sections.
- Number Formatting: Use number formats for currency, percentages, dates, or custom formats to ensure that data is displayed appropriately.
2. Using Formulas and Functions
Excel’s formulas and functions are powerful tools for automating calculations:
- Basic Arithmetic: Use simple formulas (e.g.,
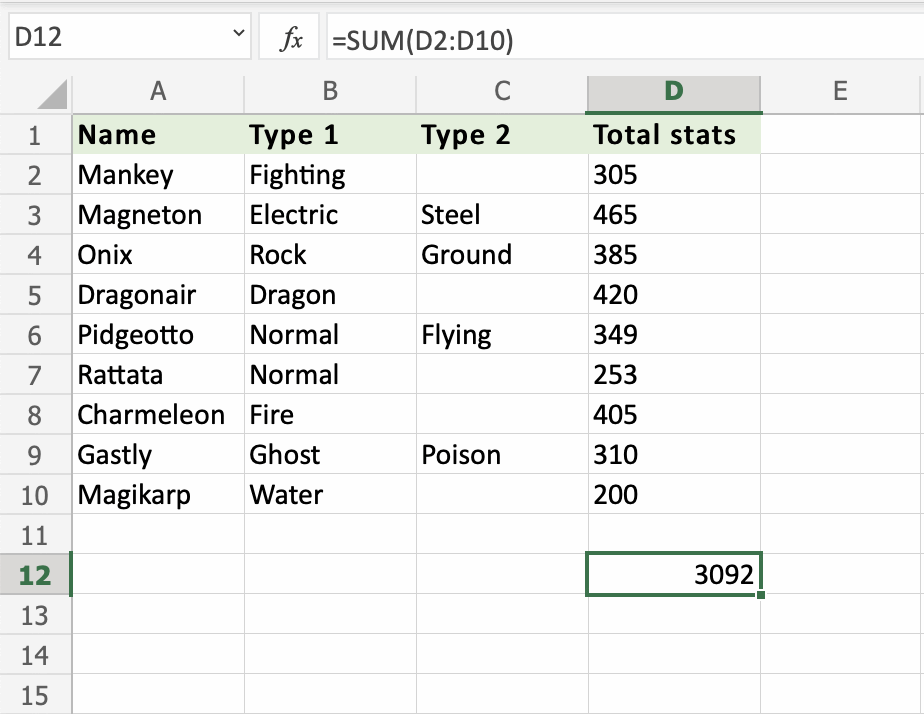
=A1+B1) to add, subtract, multiply, or divide numbers in your spreadsheet. - SUM Function: Use the
=SUM(range)function to quickly total a series of numbers. - AVERAGE Function: Calculate the average of a set of values using
=AVERAGE(range). - IF Statements: Implement logical functions like
=IF(condition, value_if_true, value_if_false)to make decisions based on specific criteria.

3. Creating Charts and Graphs
Visualizing your data can make it easier to analyze trends and present information. Here’s how to create charts:
- Select Your Data: Highlight the data you want to visualize.
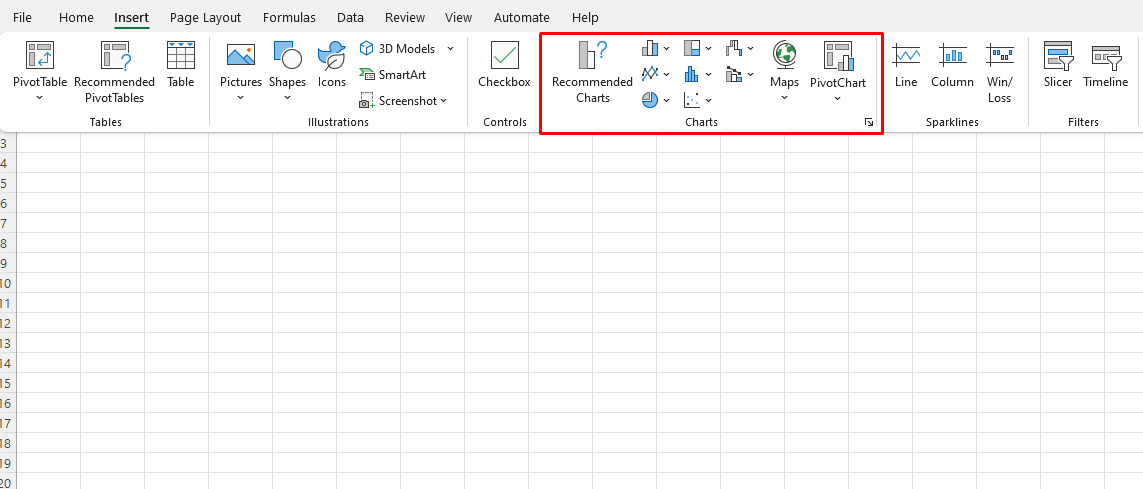
- Insert a Chart: Go to the Insert tab, choose the type of chart (e.g., Column, Line, Pie), and select a specific style.
- Customize the Chart: Use chart tools to modify colors, labels, and titles. Ensure your chart clearly communicates the data’s message.

4. Using Conditional Formatting
Conditional formatting allows you to apply formatting based on specific criteria:
- Highlight Cells Rules: Use rules to change the color of cells that meet certain conditions (e.g., highlighting expenses over a certain amount).
- Data Bars and Color Scales: Apply data bars or color scales to visually represent values in a range, making it easier to compare data at a glance.
5. Creating Drop-Down Lists
Drop-down lists help ensure data consistency and reduce entry errors:
- Select the Cell: Click on the cell where you want the drop-down list.
- Go to Data Validation: Navigate to the Data tab, click on Data Validation, and select List.
- Enter Your List Items: Type in your options separated by commas (e.g., “Option 1, Option 2, Option 3”) or reference a range containing the options.
6. Protecting Your Spreadsheet
To safeguard sensitive data or prevent accidental changes:
- Protect the Worksheet: Go to the Review tab and select Protect Sheet. Set a password if needed.
- Lock Specific Cells: Before protecting the sheet, unlock the cells you want users to edit (by right-clicking and selecting Format Cells > Protection).
Best Practices for Spreadsheet Management
- Regular Backups: Frequently save your spreadsheet and consider using cloud storage for easy access and backup.
- Use Clear Naming Conventions: Use descriptive file names and organize files into folders for easier navigation.
- Limit Complexity: Keep spreadsheets as simple as possible to make them easier to understand and maintain.
- Review and Update Regularly: Periodically review your spreadsheets to ensure data accuracy and relevance.
Unlock the full Microsoft Office experience with the cheapest Office Keys available on our website—get productivity at unbeatable prices!

