Office Blog
Creating a Professional Invoice Template in Word
An invoice is a critical document for businesses, freelancers, and professionals. It reflects your professionalism and ensures you get paid promptly. While many tools are available for creating invoices, Microsoft Word offers flexibility and simplicity, making it an excellent choice for creating custom invoice templates. This guide will walk you through creating a professional invoice template in Word.
1. Why Use Microsoft Word for Invoices?
Word is an ideal tool for designing invoices because it allows:
- Customization of layout and design.
- Easy branding with your logo and colors.
- Compatibility with most systems (Word files and PDFs).
By creating a template, you save time and ensure a consistent look for all your invoices.
2. Setting Up the Invoice Template
Step 1: Open a Blank Document
- Launch Microsoft Word and open a new blank document.
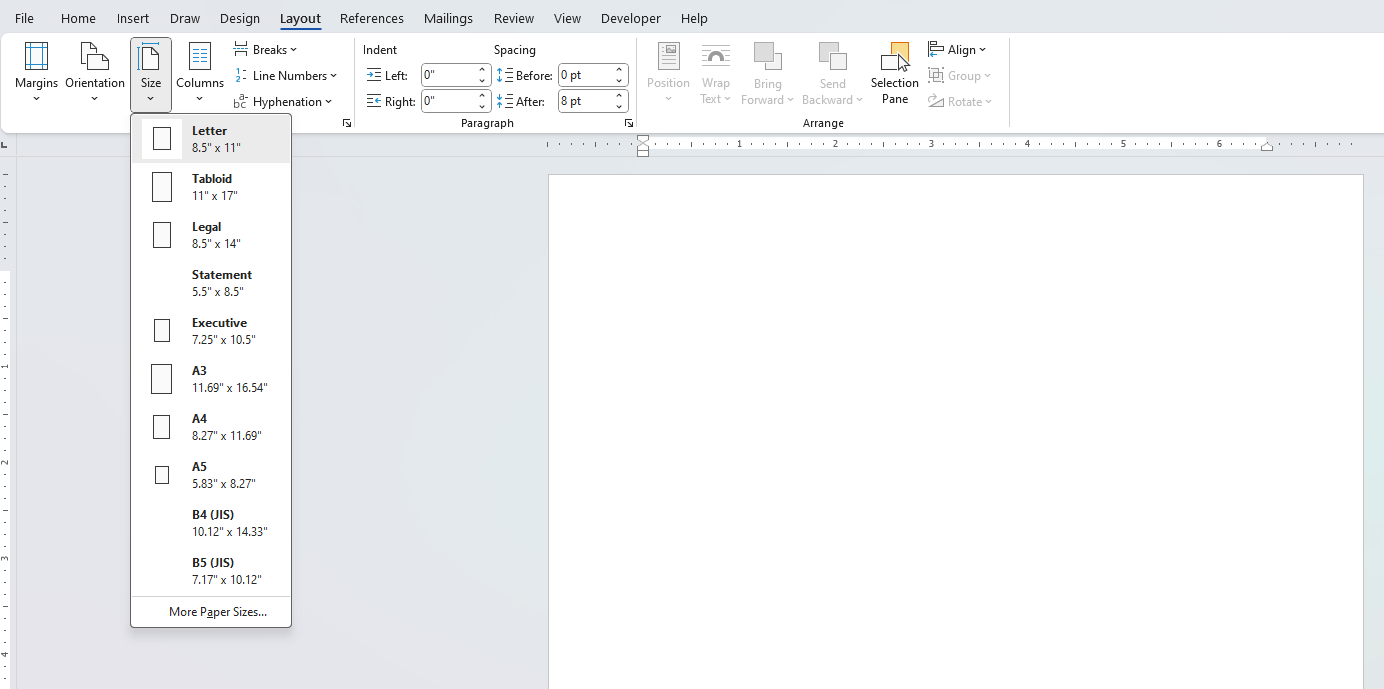
- Set the page size to match your desired format (e.g., Letter or A4).
- Go to the Layout tab, click Size, and choose your preferred option.

Step 2: Add Margins and Gridlines
- Set appropriate margins by selecting Margins under the Layout tab. A standard margin of 1 inch works well.
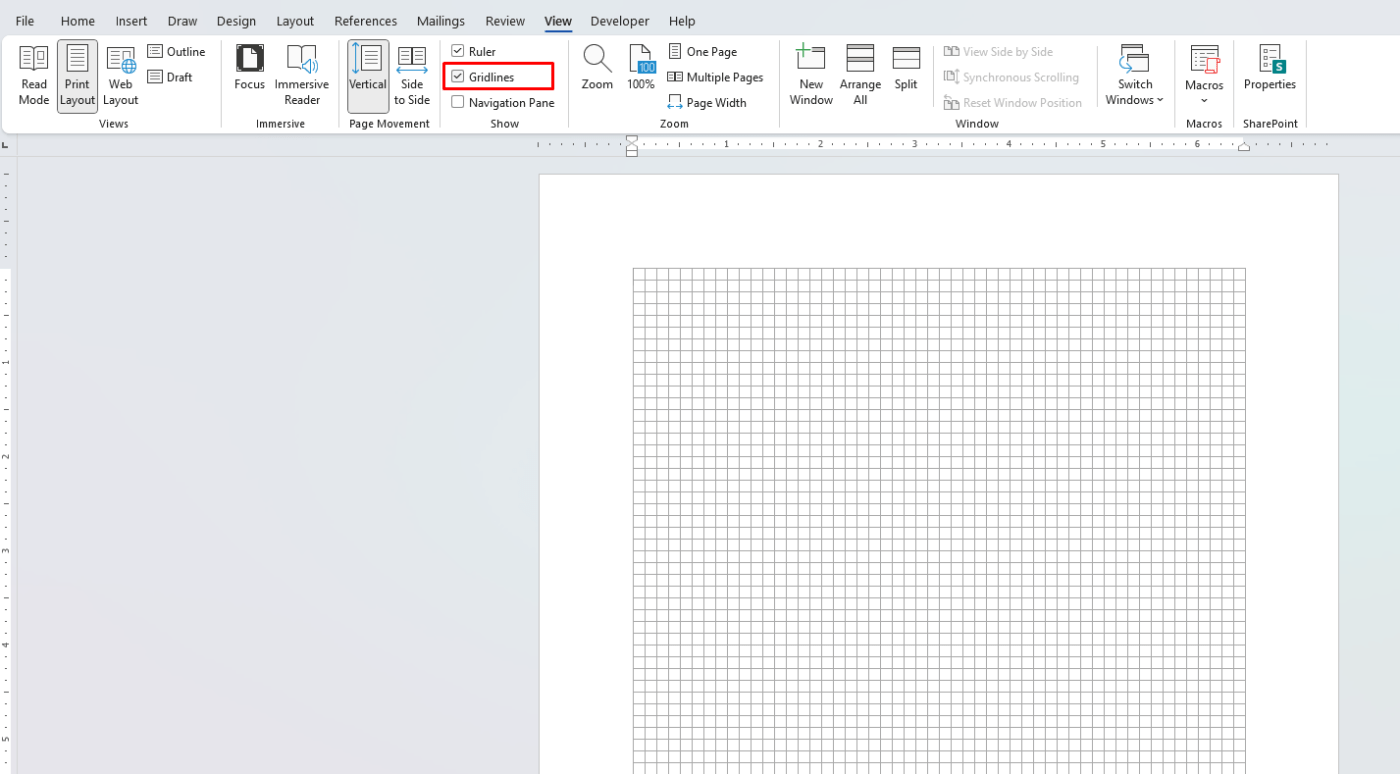
- To ensure proper alignment, enable gridlines:
- Go to View and check the Gridlines box.

3. Designing the Invoice Header
The header is the first thing your client will see, so make it professional and clear.
- Add Your Logo:
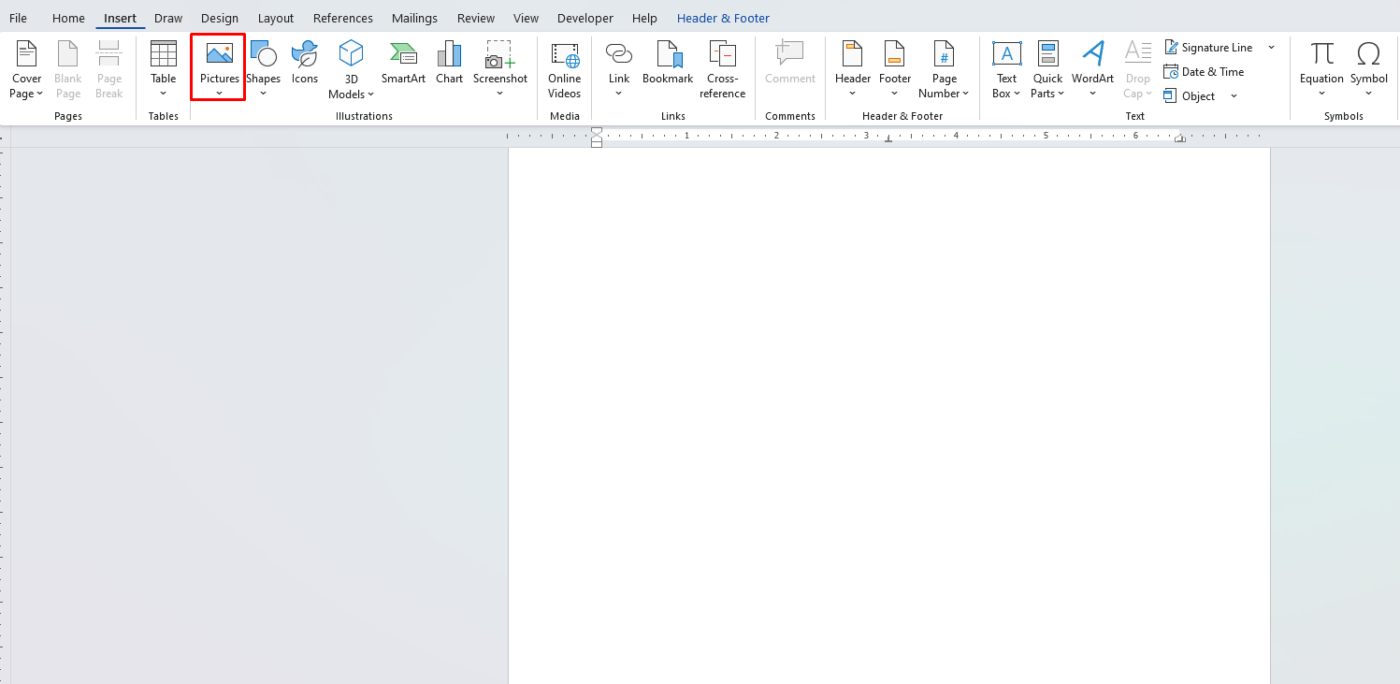
- Click on Insert > Pictures to upload your logo.
- Resize and position the logo in the top-left or center.
- Include Your Business Details:
- Below or beside the logo, add your business name, address, phone number, and email.
- Use a clean, readable font like Arial or Calibri.
- Invoice Title:
- Add the word “Invoice” in bold, larger font size. Place it prominently near the top.

4. Adding Client Information
Create a section to input your client’s details:
- Add a table or text box to organize client information.
- Include fields for the client’s name, address, phone number, and email.
- Label this section as Bill To for clarity.
5. Creating the Invoice Body
The body of the invoice contains the details of the goods or services provided.
Step 1: Insert a Table for Itemized Details
- Go to the Insert tab and select Table. Choose a table with 4–6 columns for:
- Description: Briefly explain the item or service.
- Quantity: Enter the number of items or hours.
- Unit Price: Specify the price per item or hourly rate.
- Total: Automatically calculate the total amount.
- Adjust the table’s width and borders to fit neatly within the page.
Step 2: Add a Summary Section
Below the table, create a summary for:
- Subtotal: Total of all items before taxes and discounts.
- Tax: Specify the tax rate and amount.
- Discount: Deduct any discounts offered.
- Grand Total: The final amount owed.
Use bold text to emphasize the Grand Total field.
6. Adding Payment Terms and Notes
At the bottom of the invoice, include important details:
- Payment Terms: Specify the payment due date (e.g., “Payment due within 30 days”).
- Accepted Payment Methods: List payment options like bank transfer, credit card, or PayPal.
- Additional Notes: Add a thank-you message or any relevant information (e.g., late payment fees).
7. Formatting Your Template
A professional invoice should look clean and polished:
- Use consistent fonts and colors throughout.
- Highlight key sections (e.g., totals) with bold or larger font sizes.
- Align text and tables for a neat appearance.
- Add borders or shading to separate sections visually.
8. Saving and Reusing the Template
Once your invoice is complete, save it as a reusable template:
- Go to File > Save As.
- Choose Word Template (.dotx) as the file format.
- Save it in a location where you can easily access it.
When you need to create a new invoice, open the template, fill in the details, and save it as a separate file.
Discover the cheapest office keys available online—affordable, high-quality options to meet all your workplace access needs, only on our website!

