Office Blog
Creating Custom Headers and Footers in Word
When working on a document in Microsoft Word, customizing the header and footer can add a professional touch and help keep your content organized. Whether you’re preparing a report, an academic paper, or a business proposal, custom headers and footers make your document more polished and easier to navigate. Here’s a simple guide on how to create them.
1. Opening the Header and Footer Section
To get started, open your Word document and follow these steps:
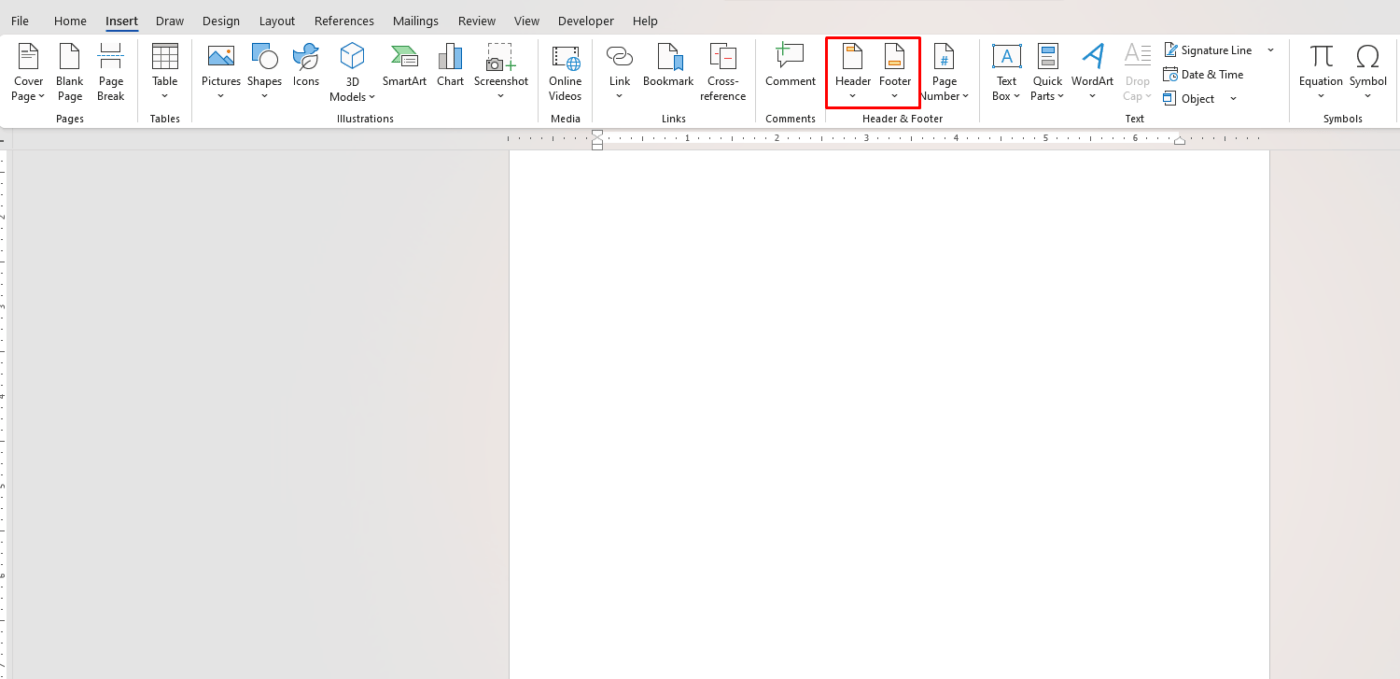
- Go to the Insert tab on the top menu bar.
- In the Header & Footer group, you’ll see two options: Header and Footer.
- Click on either one depending on which part of the page you want to customize.
2. Choosing a Style
Word offers a variety of pre-designed header and footer styles that you can easily apply:
- Click on Header or Footer, and you’ll be presented with a dropdown list of different styles, such as blank, with page numbers, or with a logo.
- Select a style, and it will automatically appear in your document.
3. Inserting Text and Graphics
Once you’ve chosen your style, you can start customizing:
- Text: Click in the header or footer area, and simply start typing. You can add the title of your document, your name, or any other relevant information.
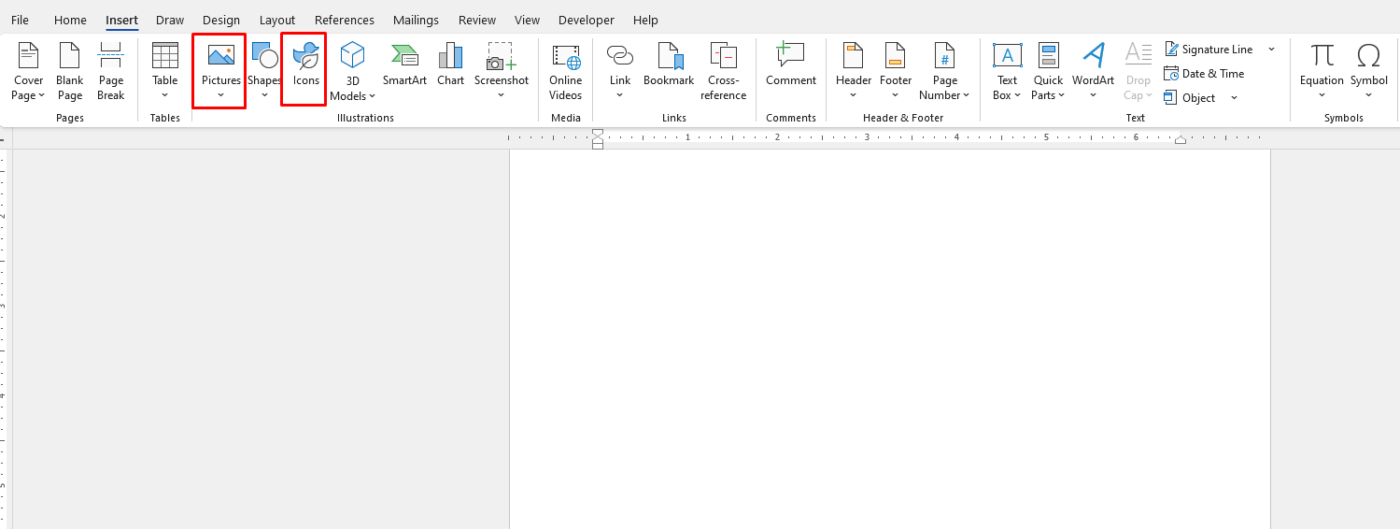
- Graphics: If you want to include a logo or an image, click on the Insert tab, then select Pictures or Icons. You can also add shapes or lines to enhance the design.
4. Adding Page Numbers
Page numbers are often placed in headers or footers for easy navigation. Here’s how to add them:
- Click on either the Header or Footer section.
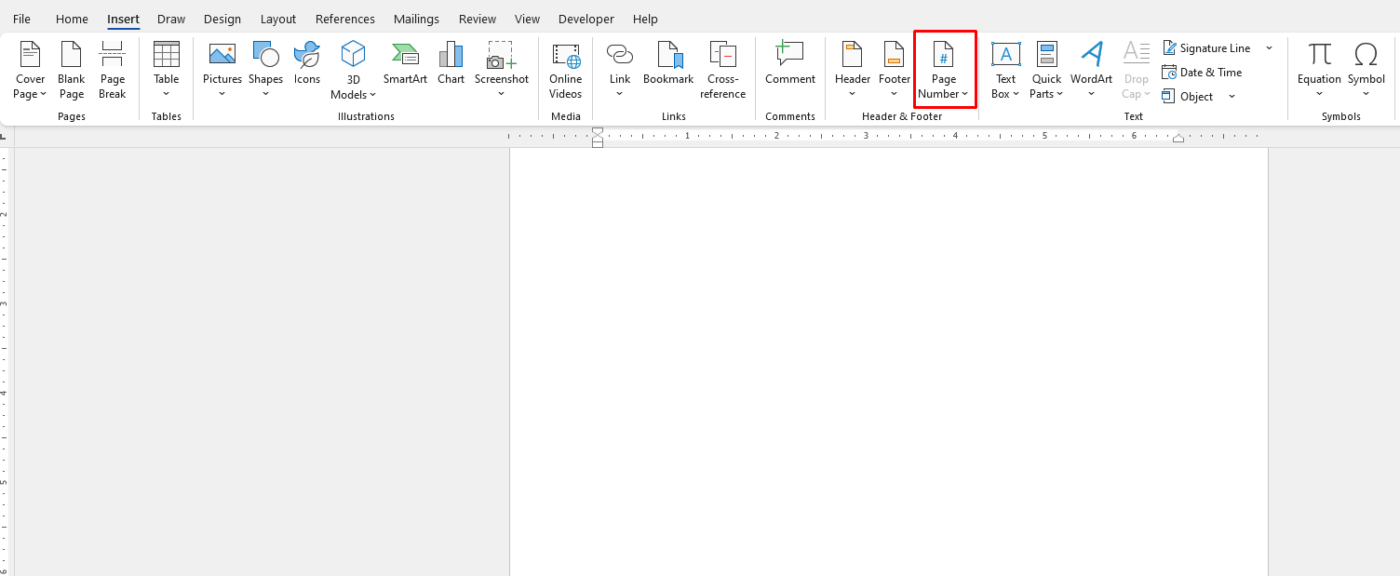
- Go to the Header & Footer group and click Page Number.
- Choose your preferred style (top of the page, bottom of the page, etc.).
5. Different First Page
If you want a different header or footer on the first page (like no header on the cover page), here’s how to do it:
- Go to the Header & Footer tab and check the box that says Different First Page.
- This will allow you to create a unique header or footer for the first page while keeping the others consistent.
6. Section Breaks for Multiple Headers and Footers
If you need different headers or footers in different sections of the document (for example, separate headers for chapters in a book), use section breaks:
- Place your cursor where you want a new section.
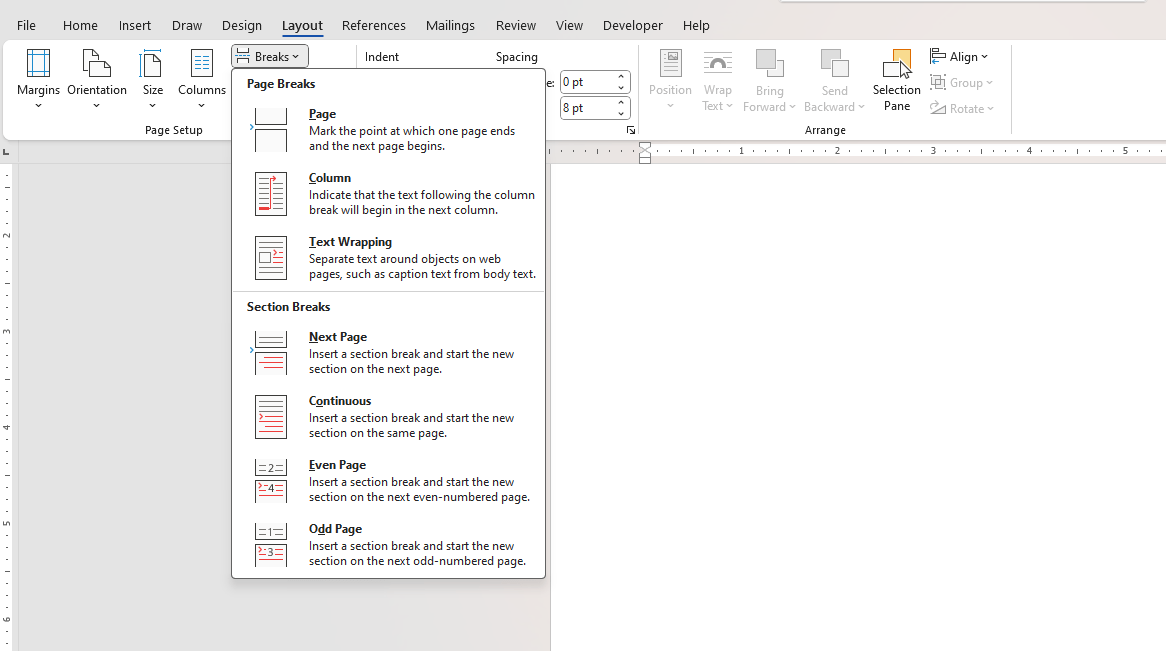
- Go to the Layout tab, click Breaks, and choose Next Page under Section Breaks.
- Now you can customize the header or footer for that section without affecting the rest of the document.
7. Closing the Header and Footer
Once you’ve finished customizing your header and footer, click Close Header and Footer on the right side of the top menu, or double-click outside the header or footer area to return to your document.
Discover the cheapest office keys available online—affordable, high-quality options to meet all your workplace access needs, only on our website!

