
Office Blog
Tips for Adding and Syncing Audio in PowerPoint

PowerPoint presentations are more than just slides of text and images. To make your presentations more engaging and dynamic, adding audio is a fantastic way to capture the audience’s attention and enhance the experience. Whether you’re adding a voiceover, background music, or sound effects, syncing audio properly with your slides can take your presentation to the next level. In this blog post, we’ll share some essential tips for adding and syncing audio in PowerPoint to ensure a smooth, professional presentation.
Why Add Audio to Your PowerPoint Presentation?
Adding audio to your presentation serves several purposes:
- Enhances Engagement: Audio makes your slides more engaging, adding a layer of depth and keeping your audience interested.
- Clarifies Content: A voiceover can clarify your key points, helping the audience to follow along more easily.
- Sets the Mood: Background music can set the tone of your presentation, whether it’s a lively, upbeat atmosphere or a more relaxed, serious mood.
- Improves Accessibility: Audio narration can make your presentation more accessible for people with hearing difficulties or those who benefit from audio content.
Step-by-Step Guide for Adding and Syncing Audio in PowerPoint
1. Inserting Audio into PowerPoint
The first step is to insert the audio into your PowerPoint slide:
- Open your PowerPoint presentation and go to the slide where you want to add the audio.
- Click on the Insert tab in the ribbon.
- In the Media group, click Audio, and select either Audio on my PC or Record Audio.
- Audio on my PC: If you already have an audio file (MP3, WAV, etc.) on your computer, select this option to add it.
- Record Audio: If you want to record audio directly within PowerPoint, select this option and click Record when you’re ready.
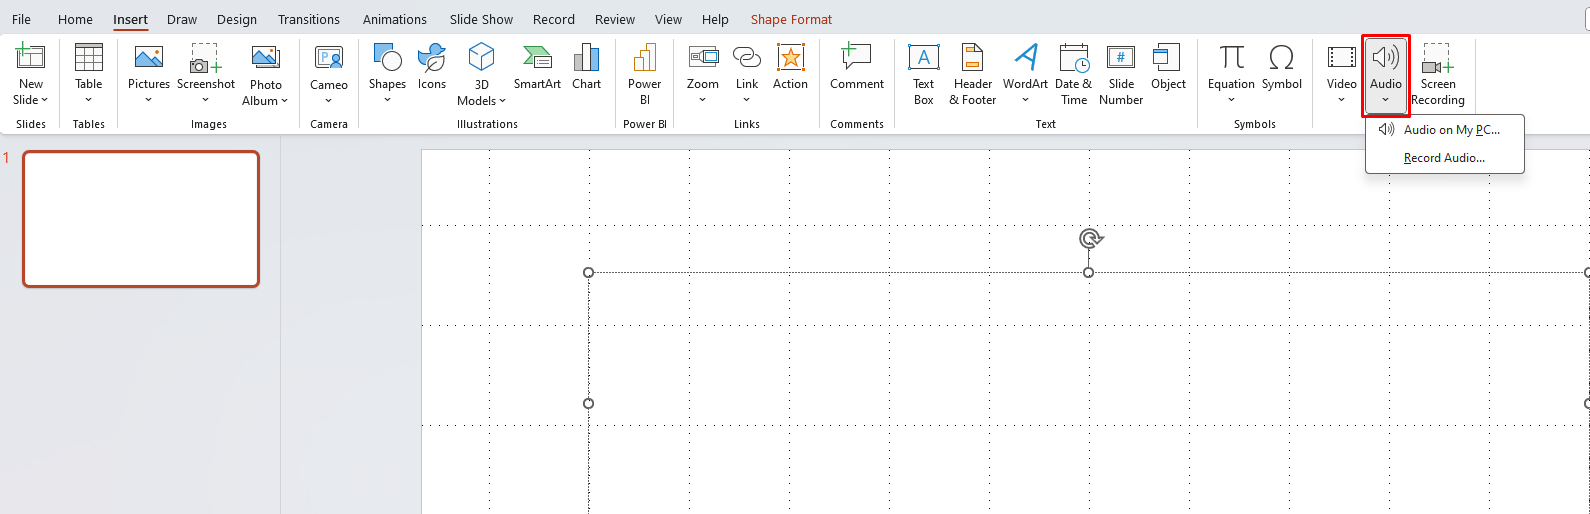
Once the audio is inserted, an audio icon will appear on the slide.
2. Set Audio Playback Options
To make sure the audio plays automatically or when you click, adjust the playback settings:
- Select the audio icon on your slide.
- Go to the Playback tab in the ribbon.
- You’ll find several options:
- Start: Choose whether the audio starts automatically or when clicked. If you want the audio to play as soon as the slide appears, select Automatically. If you want it to play when you click the mouse, select On Click.
- Play Across Slides: This is useful if you want the audio to continue playing across multiple slides without stopping. For example, if you want background music for your entire presentation, check this option.
- Loop Until Stopped: If you want the audio to loop throughout the presentation until you stop it manually, enable this option.
3. Syncing Audio with Animations or Slides
One of the most important aspects of adding audio is syncing it with your slides and animations. Here are some ways to ensure perfect synchronization:
Using Animations and Transitions
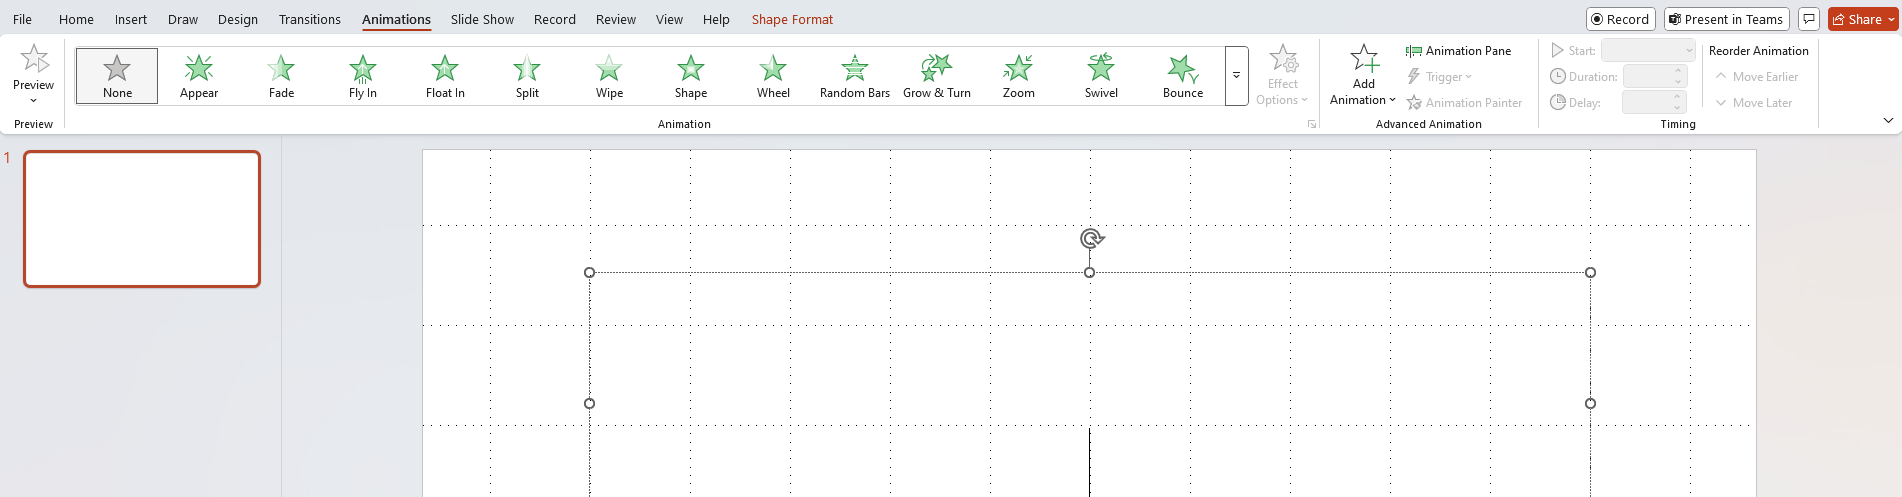
- Click on the Animations tab to apply animations to your slide elements (text, images, etc.).
- Under Animation Pane, right-click on the animation and select Timing.
- In the Timing window, you can control when each animation starts. To synchronize it with audio, select Start With Previous or Start After Previous depending on when you want the animation to occur in relation to the audio.
- Adjust the Delay and Duration so that the animation happens at the right time relative to the audio.
Using Slide Transitions
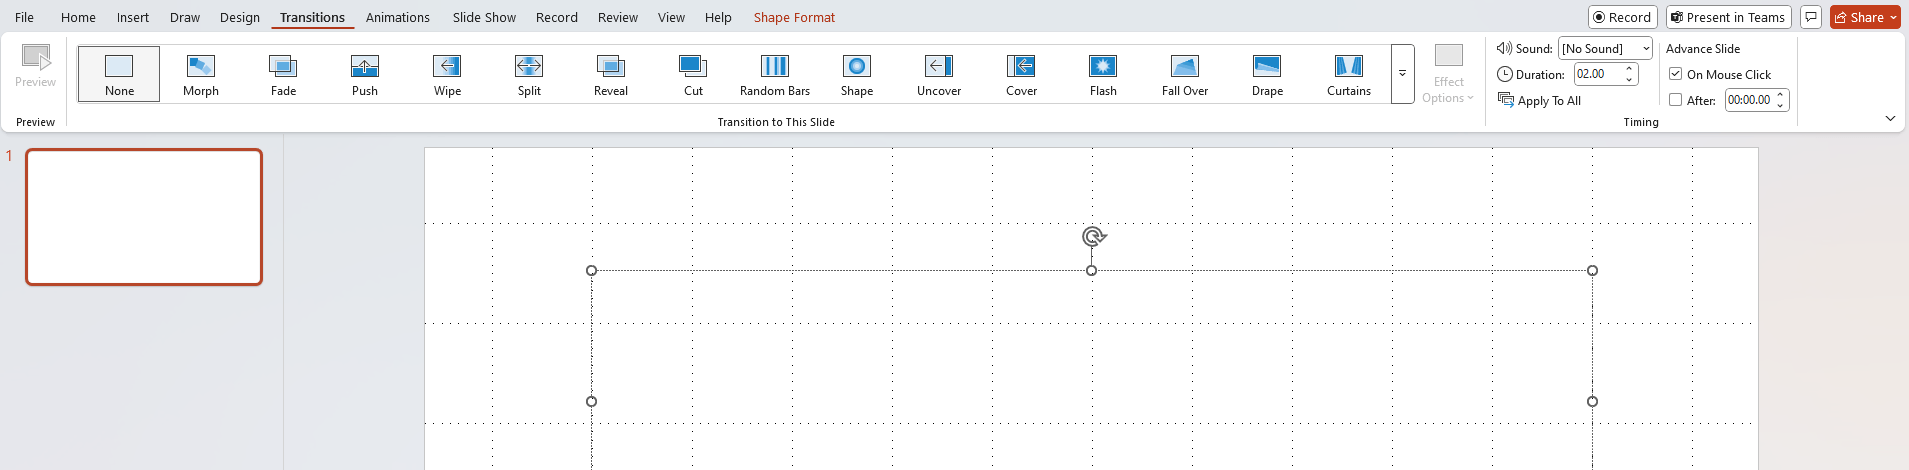
If you’re adding background music or want to ensure smooth transitions between slides while audio plays:
- Select the Transitions tab.
- Choose the transition effect for your slide.
- In the Advance Slide section, check the box for After and set the time in seconds for how long each slide will remain visible before transitioning to the next one. This can be synced with the audio’s length.
4. Recording a Voiceover for Your Presentation
If you want to add a voiceover that narrates the content of your slides, follow these steps:
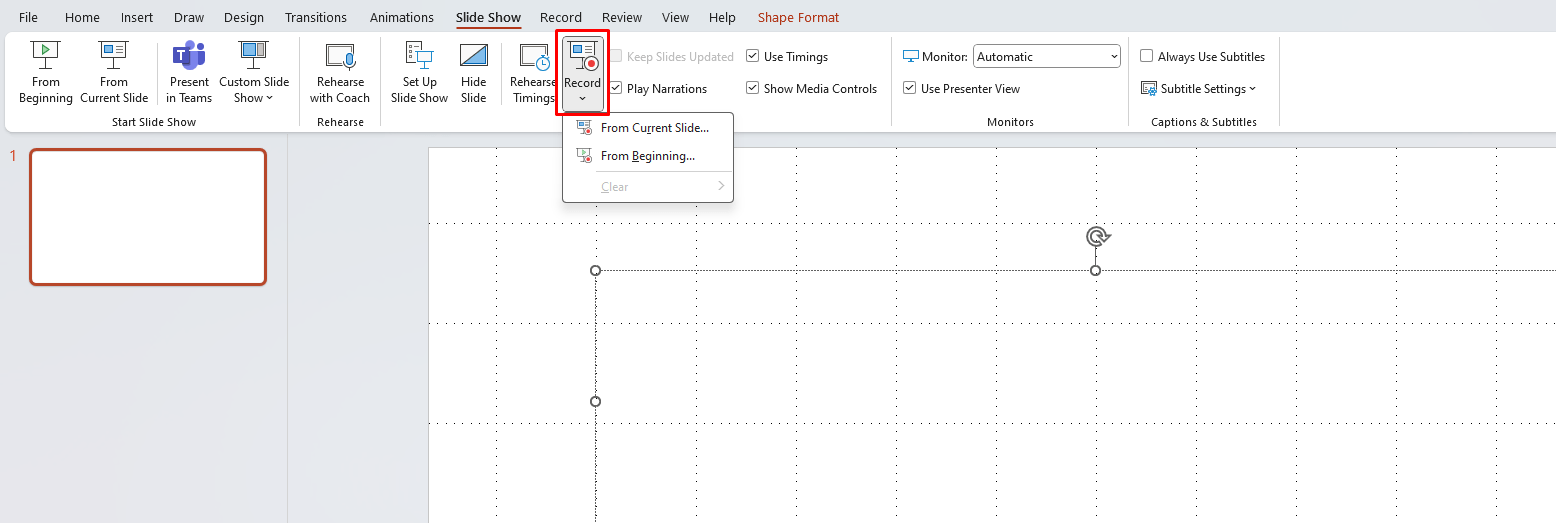
- Go to the Slide Show tab.
- Select Record Slide Show.
- Choose Start Recording from Beginning or Start Recording from Current Slide, depending on where you want to start.
- You can narrate the content as you progress through the slides. PowerPoint will automatically sync your voiceover with the timing of your slides.
- When you finish recording, click End Show, and your voiceover will be saved to each corresponding slide.
5. Test Your Audio and Adjust Timing
After adding audio and syncing it with your slides, make sure to test your presentation:
- Click Slide Show to view your presentation as your audience will see it.
- Listen to the audio to ensure that it plays smoothly and syncs with your slides and animations.
- If necessary, adjust the timing of animations, transitions, or audio settings to ensure everything aligns perfectly.
Best Practices for Adding and Syncing Audio
- Keep It Simple: Don’t overwhelm your audience with too much audio. Use it to enhance the message, not distract from it.
- Quality Matters: Make sure the audio quality is clear and crisp. Poor-quality audio can detract from your message.
- Use Audio Sparingly: Avoid overloading your presentation with too much background music or narration. It should complement the content, not overpower it.
- Test Across Devices: If you’re planning to present on a different computer or project it in a different setting, make sure your audio file works on those devices.
Get the best deals on office keys with our affordable prices—unlock your productivity without breaking the bank!