
Office Blog, PowerPoint Blog
How do you Create a Scrolling Text Box in PowerPoint?

A scrolling text box can add a dynamic element to your PowerPoint presentations, making your content more engaging. Here’s how to create a scrolling text box in just a few simple steps.
Step 1: Open Your Presentation
Command:
- Launch PowerPoint and open the presentation where you want to add the scrolling text box.
- Navigate to the slide where you want the scrolling text to appear.
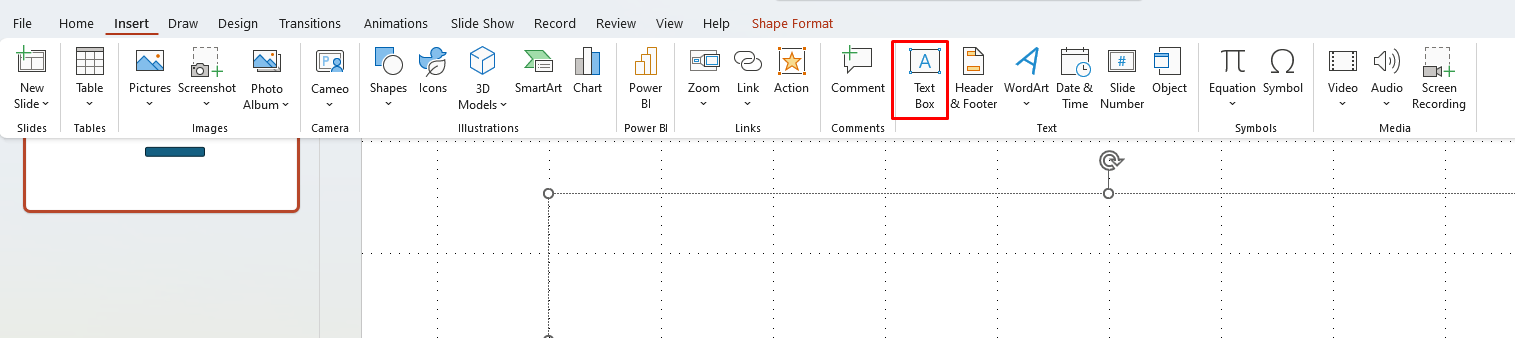
Step 2: Insert a Text Box
Command:
- Go to the Insert tab in the Ribbon.
- Click on Text Box and then click and drag on the slide to create a text box.
- Type your desired text inside the text box.
Step 3: Format the Text Box
Command:
- Select the text box and use the Home tab to adjust the font size, color, and style to your preference.
- Resize the text box by clicking and dragging its corners to fit the area where you want the scrolling text to appear.
Step 4: Add Motion Path Animation
Command:
- With the text box selected, go to the Animations tab in the Ribbon.
- Click on Add Animation and scroll down to Motion Paths.
- Choose the Left or Right motion path, depending on the direction you want the text to scroll.
Step 5: Adjust the Animation Settings
Command:
- In the Animation Pane (found in the Animations tab), right-click the animation and select Effect Options.
- Under Settings, set the direction of the motion path and adjust the duration of the animation to control the speed of the scroll.
Step 6: Set the Animation to Repeat
Command:
- While still in the Animation Pane, right-click on the animation and select Timing.
- In the dialog box, set the Repeat option to Until End of Slide for continuous scrolling, or choose a specific number of times for limited scrolling.
Step 7: Preview the Animation
Command:
- Click the Slide Show tab and then select From Current Slide to preview your animation.
- Check to see how the scrolling text looks and make any necessary adjustments to speed or direction.
Step 8: Save Your Presentation
Command:
- Once you’re satisfied with the scrolling text box, click on the File tab and select Save to save your changes.
- Consider saving a backup copy in a different format or location for security.
Get your genuine Office keys at unbeatable prices and elevate your productivity with essential tools for work and home!